
Hi Folks:
I’ve been making digital panoramas since I owned my first digital camera, and some time before that with prints (although we called them photomosaics back then). Just to be clear, there’s a difference (at least to me) between a panoramic image – one that’s been cropped to a wide-aspect format – and a digital panorama. A digital panorama is one where 2+ images of the same scene are combined in post-processing software to create one image that captures more of the scene than could be contained in a single frame. There are several advantages to creating panoramas; three of the most prominent are:
- the aforementioned ability to capture more of a scene
- the ability to use a longer focal length lens to avoid wide-angle lens distortions and vignetting
- the ability to create higher resolution images than can be captured in a single image
We’re not going to get into the technical details of making panoramas in this post, but those who are interested are welcome to review our other posts on panoramas, here. This is an example of a digital panorama:

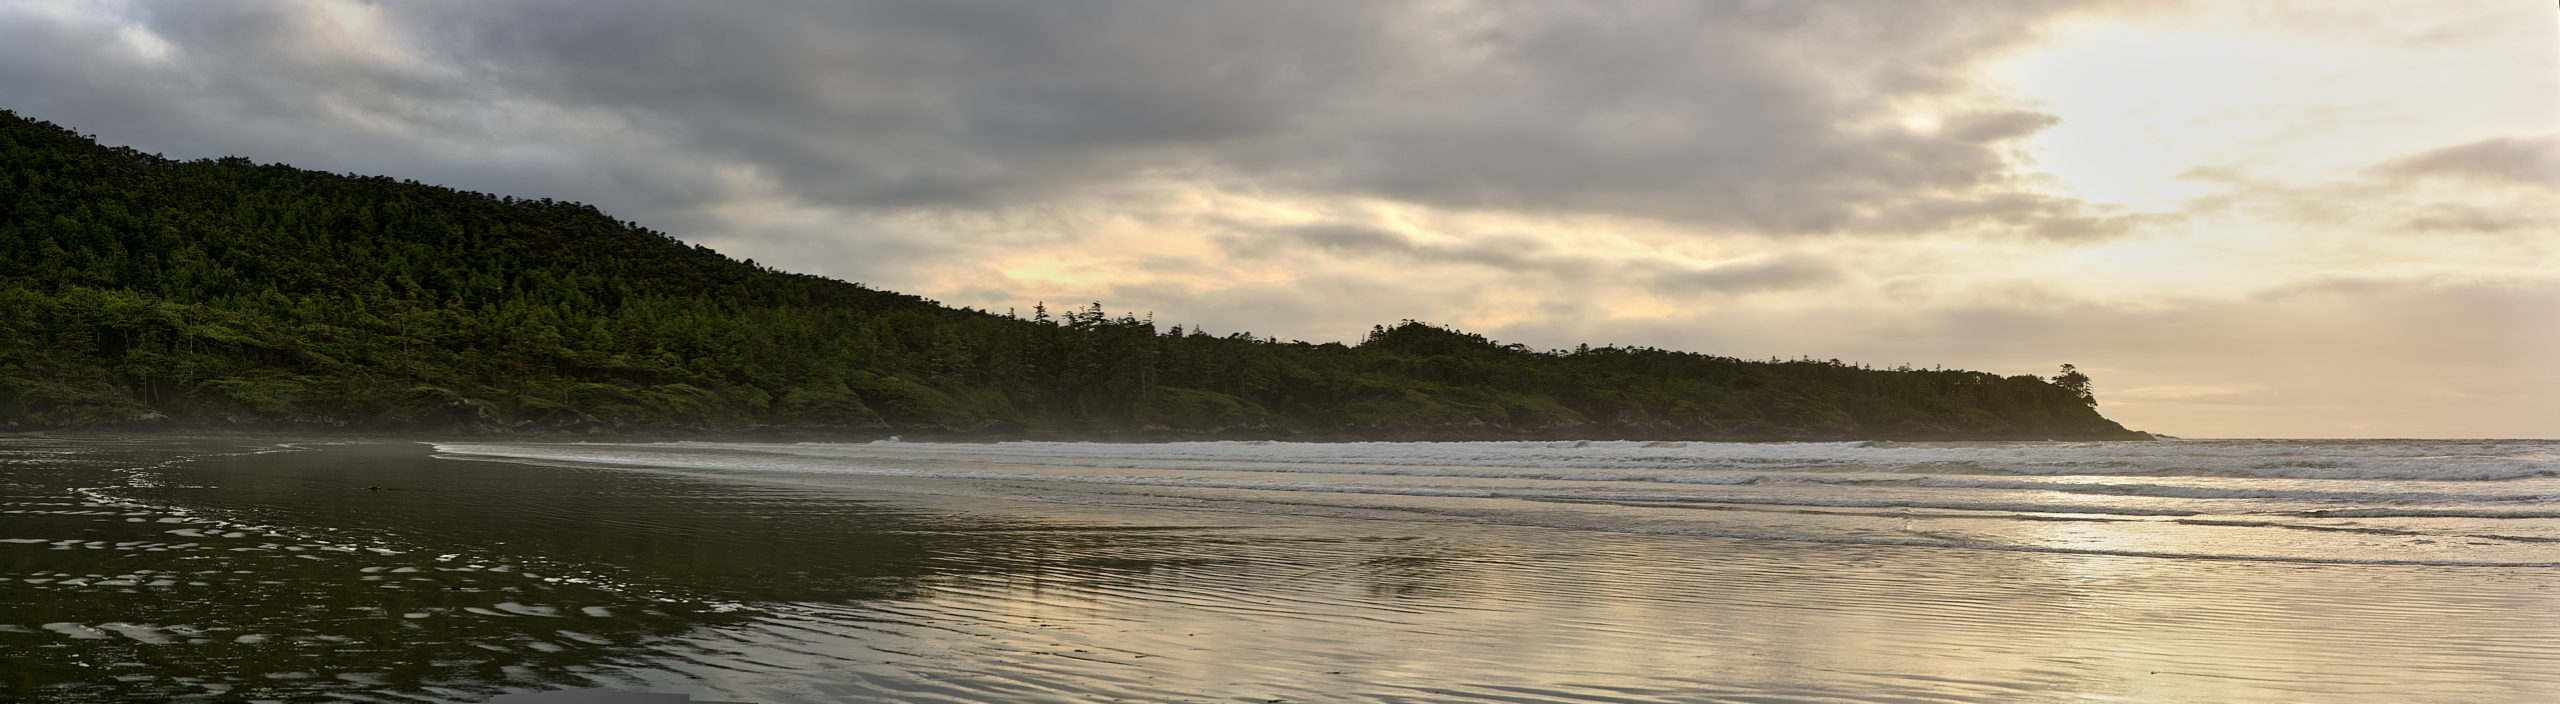
Tofino, BC – 60 images (click on any image to see it larger)
Now, if you’ve studied panoramas at all, you probably learned from a similar playbook to mine:
- do not use polarizing filters
- do use manual focus and manual exposure
- rotate the camera around the entrance pupil of the lens (no, not the nodal point)
- overlap each successive image by 10-30%.
Panoramas are most often made using a stable tripod and a special panoramic mount; depending on the camera to foreground distance and the number of images to be used, sometimes one can shoot panoramas handheld. The one thing anathema to panoramas is movement of an image element between frames. Elements that move between one frame and another are called ghosts, and pretty much all panorama software has some way of dealing with ghost reduction (some better than others).
Where this breaks down is when shooting images of water, especially rivers or waves, because they are defined by their movement. For a single image one can either use a high shutter speed and freeze the movement, or use a long exposure to smooth out the movement. With a panorama, however, what gets magnified is the transition of the movement between image frames. There’s no ghost reduction software that I know of that does this well. I’ve read about several ideas/ techniques to try to mitigate this movement in the final stitched panorama, but none of them work very well either.
We were in Tofino, BC last autumn, and there are some wonderful beach walks in the Tofino area. This inspired a simple idea that I’ve not seen anywhere else when it comes to making panoramas of moving water: shoot more frames.
To combine several images into one panorama, the software first creates control points:

control points between two image frames
Control points are the same image element in two or more images. It could be a stone on the beach, a tree branch, or any specific element. Remember that the software has no idea what it’s looking at. It’s simply looking for essentially the same pixel in two or more frames. It uses those control points to bend, twist and stretch the data to combine the individual frames into the completed panorama. By providing more base data it makes it easier for the software to link the frames together.
For example:

Tofino, BC – single image
This is a single image of Cox Bay beach, south of Tofino. It was made with a Sony 24-105mm lens at 48mm, and it shows only a tiny part of the beach.
Traditionally, to make a panorama one would set the camera on a tripod in portrait orientation and allow some overlap between each frame. Multi-row panoramas like the image at the top of this post are more complicated and we won’t get into that here. The image below is the beginnings of a panorama made with seven exposures to capture more of the beach:

Tofino BC – seven images, with overlap
As you can see, there’s a lot of movement in the waves between each frame. This is made worse by having to take the time to make an exposure, rotate the camera (making sure to allow proper overlap), making another exposure…
This is the result of combining those seven images into one panorama:

Tofino, BC – seven-image panorama
If you look at the rocks, trees, clouds, etc. above the horizon line, everything lines up well. But it’s very easy to see the breaks in the waves. It’s nearly impossible to come back from that.
Now, every digital camera has a burst mode, where simply holding down the shutter button will make multiple images in sequence. How many images can be made before the camera fills the buffer and the time interval between frames varies by camera, but this was the basis of my idea. I set my Sony a7R III on my tripod, made sure both the tripod base and the camera were level, set up the focus and exposure settings, then simply panned the shot, holding down the shutter as I did so. I ended up making 23 exposures for this scene. This shows the beginnings of the panorama made with 23 images:

Tofino BC – 23 images, with overlap
As you can see, the breaks in the waves between frames are much reduced. Here is the final panorama made from the 23 exposures:

Tofino, BC – 23-image panorama
This is much improved. However, if you look at the lower-left of the frame you can still see some breaks. This isn’t an image I would keep, but it serves its purpose here.
I’m sure somewhere there’s a person who could factor the lens focal length, the sensor size, the resulting field of view for each image, the distance from the water’s edge, the wind velocity and resulting wave height/ frequency and the number of frames/second captured by the camera… and develop an algorithm in terms of degrees of arc/ second for how quickly to rotate the camera. I am not that person. The best I can suggest is trial and error, based on the equipment you have. You can always shoot several sequences, combine each set of frames and see how they work out.
Here are a few more examples, made on the same trip:

Tofino, BC – 38-image panorama

Tofino, BC – 38-image panorama

Tofino, BC – 35-image panorama
There are a few things to keep in mind when doing this:
- the most important is understanding the technical abilities and limitations of your camera, both in terms of the frame rate and the number of frames it can make in one burst
- there’s no pausing here – keep the panning smooth and steady
- pan in the direction of the flow, rather than against it – i.e. if the waves (from your position) are moving right to left, pan from right to left to follow them
- keep in mind that since the camera will be panning to make the exposures, you need to ensure a sufficiently high shutter speed to negate motion blur within each frame
- depending on the lighting conditions, this may mean increasing the ISO. As the camera to foreground distance in this kind of work is usually large, DoF becomes less important and (depending on the lens) one can shoot at a wider aperture and use hyperfocal distance. Shooting at higher ISO levels means less dynamic range and (depending on the camera sensor), more noise
The final thing to consider here is: RAW files or rendered files to create the panorama? If you’re shooting in-camera .jpg then the question is moot. If you’re shooting raw files, you can either use the raw files themselves or write them out as .tif files from your raw converter and use those .tif files to make your panoramas. Which is better? It depends, largely on what software you’re using as your raw converter and/ or your panorama stitching program. One will have a rendered image file at the end of making the panorama anyway. Working with raw files is definitely simpler, but there are caveats:
- the first is lens distortion. Most if not all wide-angle lenses have some lens distortion, often specific to that make/model of lens. Good panorama software will be able to read the focal length of the lens from the raw metadata, but may not match the profile of the lens itself.
- certain actions like noise reduction are better done with raw files, but that correction isn’t necessarily transferred to the panorama software.
- while I recommend using a stable, level tripod for panning, there may be an occasion where you will want to make a panorama without having the necessary equipment handy. With a large camera to foreground distance parallax becomes less of an issue and it can be possible to make the requisite frames handheld. The image used above as demonstration (7/23 frames) was shot handheld. One of the challenges with that is maintaining a level horizon for each frame when panning. Again, one can level the horizon in each image frame in the raw converter but those adjustments won’t necessarily be transferred to the panorama software.
- spot reduction from dust on the sensor for a single image frame can usually be easily remedied, but that same spot, multiplied across multiple frames can make it more complicated:

panorama dust spots
Again, it depends on the software you’re using. If you’re using something like Lightroom or (soon) Capture One as both raw converter and panorama software, then the corrections to each base image are intrinsic. In this case one can correct the defects in each raw file and then use those corrected images to build the panorama. If one is using a second software program to build the panorama, then in some cases it may be necessary to correct the raw files, export them as .tif files and use those to build the panorama.
One final caveat is that, depending on your camera and your computer, you can get into very large files. My Sony a7R III raw files are roughly 80MB each. Multiply 80MB by 38 images and I’m now feeding over 3GB of data into the panorama software. If I export full-frame .tif files from Capture One, each file is now roughly 200MB. That means I’m feeding some 7.6GB of data to the panorama software. Yes, I sometimes try to make smoke come out of my computer. Close down as many other programs as you can, and be patient with it. Final file sizes can also be quite large. For example, the image below is more than 25K pixels wide and has a file size of over 2.5GB. I’ve had some panoramas that are 30-35K pixels wide. Just loading them into Capture One and editing them takes some time.

Tofino, BC – 36-image panorama
Okay, that’s it! Made it this far? Congratulations! Now go out and make some images!!
Hugs,
M&M