
Hi Folks:
I’ll be the first to admit there’s a lot about colour I don’t know, so feel free to correct me if I misstep. I have a Sony A7RIII, Capture One Pro for Sony 20.1 and Affinity Photo 1.8.3.
NB: I can’t see what you’re seeing because your monitor is different. Also, these are sRGB .jpg screen captures of what I’m seeing. Still, there’s value in comparing them to each other.
Since Lightroom (Lr) 6.14 doesn’t work very well with my .arw files, I’ve been using Affinity Photo (AP) to combine my HDRs and panoramas. I’ve learned a few things. I took nine images made last October to play with. None of this is worth keeping, but it’s good to play with.
1) You can just put all of the images into one panorama. The results are decidedly underwhelming:

2) The other way is to make HDR merges first, and then combine them into one panorama file. However: (you knew that was coming ![]() ). There are a few options here. One starts with the 3, 5 or however many images you have for your stack, and in AP go to File/ New HDR Merge: From there you have the option to auto align, turn on/off Noise Reduction and enable/disable tone mapping. Until now I’ve never been overly comfortable with processing in AP so I’ve always turned those options off. We’ll come back to that.
). There are a few options here. One starts with the 3, 5 or however many images you have for your stack, and in AP go to File/ New HDR Merge: From there you have the option to auto align, turn on/off Noise Reduction and enable/disable tone mapping. Until now I’ve never been overly comfortable with processing in AP so I’ve always turned those options off. We’ll come back to that.
3) After creating the HDR merge(s) you can save each set as 32-bit .aphoto files. However: when it comes to the panorama, .aphoto files can’t be used for panoramas. They’re invisible to the import window. The other choice is to export them out as 32-bit .tif files. You go to File/Export, choose TIFF, then click More:

4) Once you’ve created your HDR merges you then use the .tif files to create the panorama. NB: Neither Lr 6 nor Capture One (C1) 20 will open the 32-bit .tiff files but that’s okay. They’re only to make the panorama. You select your images, create a panorama and you’re good to go.
5) Okay, this is where we come back to the tonemapping part in step 2. Not being comfortable with AP, I’ve always turned this off and then tried to muddle through with the result. Not great. This is a panorama made from the three sets of (non-tonemapped) 32-bit .tif files:

I tried doing a Curves adjustment, Shadow/Highlight adjustment, Levels adjustment, but nothing really worked.
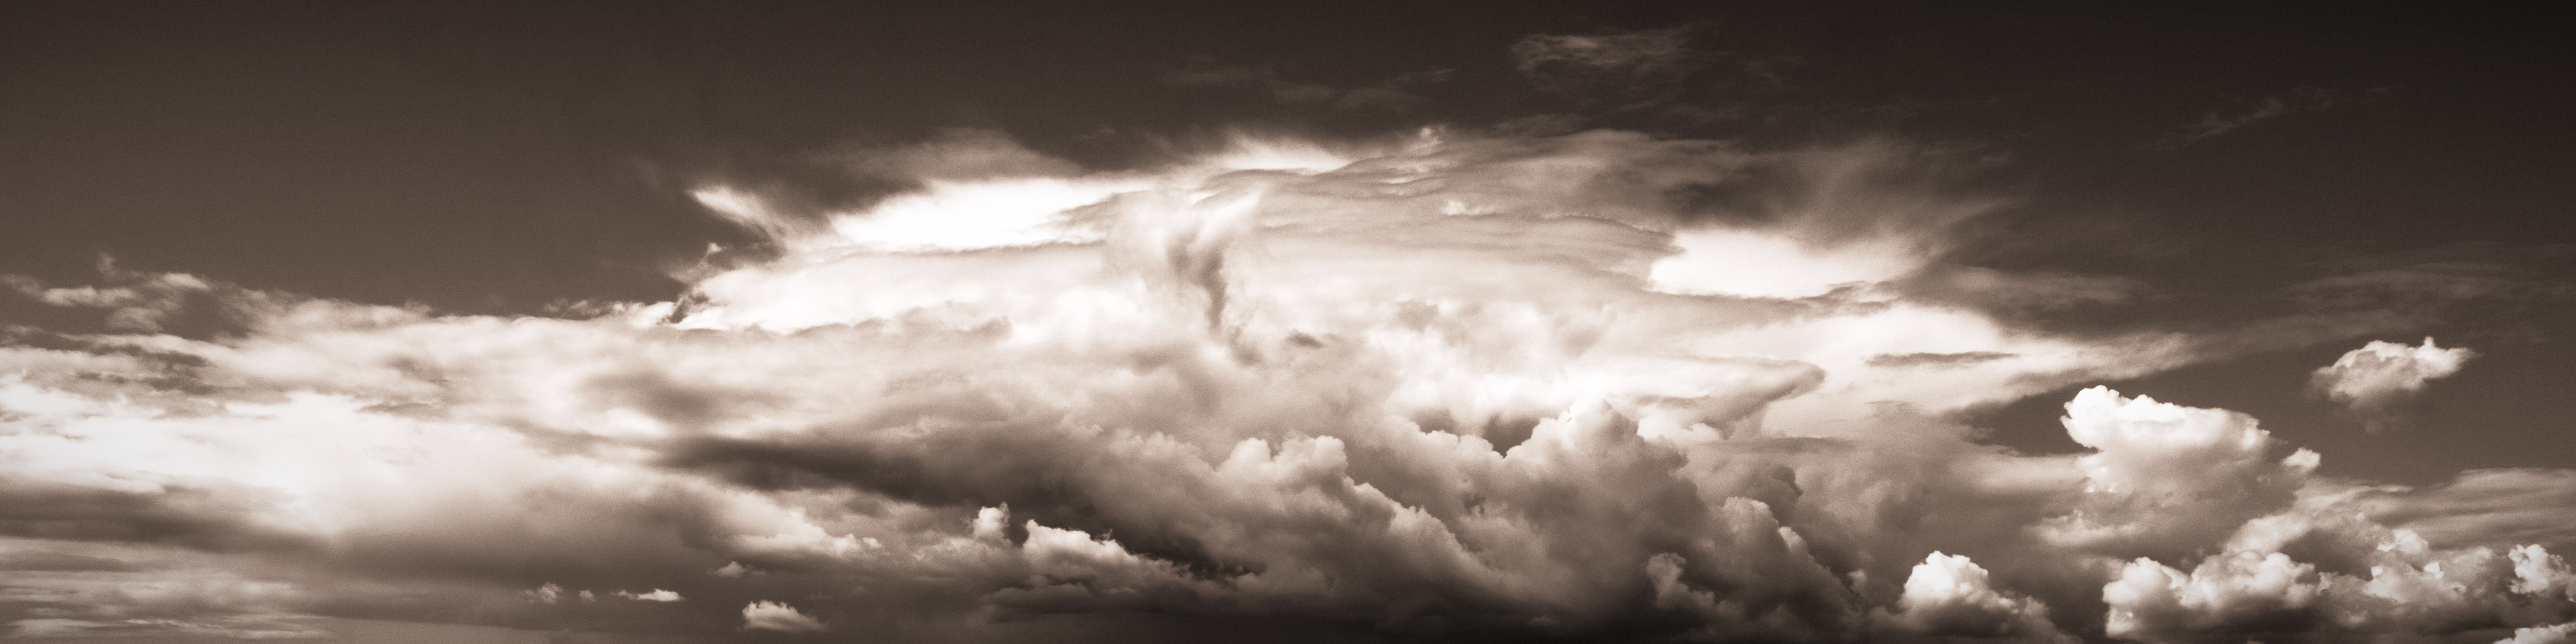
6) So, the other option is to tonemap each HDR merge first, and then combine those into a panorama. Since you know what you’re about, when you made your base images I’m assuming that you a) used manual exposure so as to avoid exposure variability in the images and b) removed your polarizing filter because polarizing effects change depending on angle to the sun. As such, the tonemapping adjustments for each set of HDR merges should be identical. The simplest way (to me) to do that would be to start recording a macro before tonemapping the first HDR merge, then run the macro for each subsequent set. Unfortunately that’s not possible as one can’t access the Macro library at this point. So I did the next best thing, which was to record the slider values in a Notepad file as I set them, then used the same values with the other sets. Here’s that result:

There is some haloing around the trees but this was a backlit image made with a 12mm lens so it was pretty challenging to start with. If I was going to keep this I’d definitely adjust the tonemap sliders and pull down the tone compression some, etc. Still, of the group it’s the best by far.
Next phase. Someone suggested I look at SNS-HDR (SNS) instead of AP. There’s a Home version and a Professional version and it looks like the only differences between the two are a batch processing engine and €55. I don’t know if the former is worth the latter, but that’s up to you. The Home version doesn’t have a free trial but the Pro version does (with watermark).
I did a few quick comparisons using one of the three HDR sets I’ve been playing with. First of all I opened the three raw files in both AP and SNS and turned off everything in terms of auto alignment, tonemapping, etc. That got me this:

The first thing I noticed was the difference in Highlights. I brought them both into C1 to compare, and turned on the Highlight warning:

Undaunted, I opened both images in C1, zoomed into 400% on both images, used Normalize to set the White Balance (WB) and Exposure as close as possible, and otherwise made the same adjustments to both. These look like crap, but it is at 400% and it’s a screenshot. Still serves as a comparison:

The SNS image seems to me to have more definition.
Next I did the same thing, except this time I turned on the auto tonemapping in AP and the auto luminance in SNS:

Again, this isn’t where I can get it to, this is where we’re starting from using auto settings. I did the same thing, opening them in C1, zooming into 400%, using Normalize to equate the WB and Exposure and setting the other sliders the same:

Again, the SNS seems to have more definition. Now, for making panoramas, the advantage of AP is that one can export 32-bit TIF files from the HDR merges and use those to create the panorama. SNS does 8/16-bit export only. One disadvantage of AP (as mentioned) is that when one does manual tonemapping on each set of HDR merges, there are no presets and no way of duplicating the settings other than to record them somewhere. With SNS there are several built-in presets: Neutral (all zeroed), Natural, Landscape, Interior, etc. There is also the option to make personal presets and it has a pretty robust set of processing options:

Finally, since the demo version of Pro has the batch processing, I selected all nine (3×3) sets of images and created 3 HDR merges with the Landscape preset setting. I took those and created a panorama in AP and came up with this. Other than edge infill and cropping, no further processing has been done:

Not a bad starting point. I think I could work with that.
Okay, that’s enough HDR stuff. How about straight panoramas?
1) In Affinity Preferences/Colour I have the default set to ProPhoto RGB:

2) If I select some raw files and make a panorama out of them, Affinity stacks them and renders them as a panorama. At that point I click on the Develop module, go down to Profiles and set the profile to ProPhoto RGB and click Apply. Once you click Apply it sets the rendered file as a pixel layer. If you go to Document/ Convert Format / ICC Profile you’ll see that Affinity has set the Document ICC profile to ProPhoto. It appears to default to sRGB but I haven’t tested it extensively.

3) Now, Lr works with Melissa RGB as a default colour space. C1 doesn’t say, but I presume it’s similar. No matter. When I imported these raw files into C1 I used the Sony A7RIII generic profile, and the standard curve. No other adjustments have been made.
4) I exported the three raw files from C1 as .tif files using the ProPhoto RGB colour space, imported them into AP and made another panorama. I exported the panoramas made with the raw files using an sRGB Document profile and a ProPhoto RGB document profile (both exported using a ProPhoto RGB profile), and I exported the panorama made using the .tif files, again using a ProPhoto RGB profile. I imported those three panorama files into C1. Here’s the comparison:

The top three images are the raw files in C1. Bottom left is the panorama made from the C1 .tif exports. The other two images are the panoramas made from the raw files, using an sRGB Document profile and a ProPhoto RGB Document profile. The last two are almost indistinguishable, but there’s a small difference with the other four.
Here’s another example:

This is an overlay with two of three raw files in C1 on the left, and the panorama made from them in Affinity Photo on the right.
I exported the three raw files as .tif files and made a panorama out of them:

Again, quite a difference. It seems that while Affinity can make panoramas, I need to create .tif files first rather than simply using the raw files.
Okay, that’s it for now. Go out and make some photographs!
Hugs,
M&M
P.S. For those who haven’t yet asked, I do have the older (free) version of Nik/DxO HDR Efex Pro. It also makes HDR merges, but one must create .tif files first. I was trying to work with the raw files (not always successfully). I’ve also tried Photomatix Pro; it’s $129 CAD. For panoramas I’ve tried PTGui, Hugin and others. PTGui Pro will make HDR panoramas in one step, but it’s $390 CAD. You can see here for more: Cell Phones, HDR and Panoramas.
P.S. II, the sequel. For more posts on photography tutorials, click here.