
Hi Folks:
Solarization or the Sabatier Effect is a technique that goes back to the 19th century. While it was likely first discovered accidentally, it came to be used for creative purpose. Solarization is a technique of grossly overexposing a negative so that some or all of the image becomes reversed – the brightest become darkest and vice versa. This was sometimes seen even in early Daguerrotypes and was later adapted to printing as well.
Fast forward a couple of centuries, and overexposing your sensor simply gets you a histogram with no highlight detail… not nearly as exciting.
While it’s possible to create this kind of effect in Photoshop using layers and blend modes, as I’ve mentioned in earlier posts I like to play around to see what I can create in Lightroom. Now, since Lightroom doesn’t work natively with layers, it’s really impossible to do this with just Lightroom, so I turned to the LR/Enfuse plugin from Timothy Armes instead. Originally created for merging HDR exposures, the LR/Enfuse plugin can be used creatively in other ways as explained here: Using the LR/Enfuse plugin for Lightroom. LR/Enfuse is donationware, and well worth whatever you can afford to pay for it.
Creating this effect in Lightroom is actually quite simple. Essentially one begins with an image, converts it to monochrome (B&W), duplicates it and creates a negative version of that. Then the two are joined together using LR/Enfuse. We’ll go into that in a little more detail.
For this exercise we’ll start with an image of a star magnolia that I captured with my cell phone. This image is as ‘unprocessed’ as a .jpg can be. Because we’re going to be working in B&W the first step is to create two Virtual Copies. One could work with the original image and convert it to B&W, but we’re going to need two separate images to play with anyway and I like to leave the original image alone.

For the first Virtual Copy we open it in the Develop module and convert it to B&W by clicking on Black & White in the Basic panel or by hitting the ‘V’ key.

Image Converted to B&W
The second Virtual Copy we also convert to B&W, but we take this one a step further by creating a negative Tone Curve. There are two ways to work with the Tone Curve Panel in Lightroom: Regions and Point Curves. Click on the little curve (with the point) in the bottom right of the Tone Curve Panel to enable the Point Curve, then click and drag the black point from the bottom left to the top left and the white point from the top right to the bottom right. Once you’ve done this you can create a Negative Tone Curve preset if you like (checking only the Tone Curve box) or you can simply download this one: Negative Tone Curve preset.

Image created with a negative Tone Curve
Now, in a perfect world if we sandwiched together a positive and a negative of the same image we’d get a nice box with a uniform 50% gray, which wouldn’t be very helpful at all. Fortunately, with a 1 or 0 out of place here and there that’s not what we get.
The next step is to return to the Library module, select the two images we’ve just created and join them using the LR/Enfuse plugin. NB: You will have to disable the ‘AutoAlign’ feature in LR/Enfuse, because I can guarantee the software won’t find two identical pixels to match up and it will generate an error if you try.
The image created using LR/Enfuse will come out looking something like this:

‘Solarized’ image
Not completely flat gray, but pretty close. Open this image in the Develop module, and begin by increasing the Contrast then settting the Whites and Blacks sliders. You may have to adjust the Exposure, and you can try adjusting the Highlights and Shadows, depending on the image. You can also tone the image using the White Balance Temp: and Tint sliders or by using the Split Toning panel. Whatever works for you. After cropping and sharpening, the final image looks like this:

Finished image
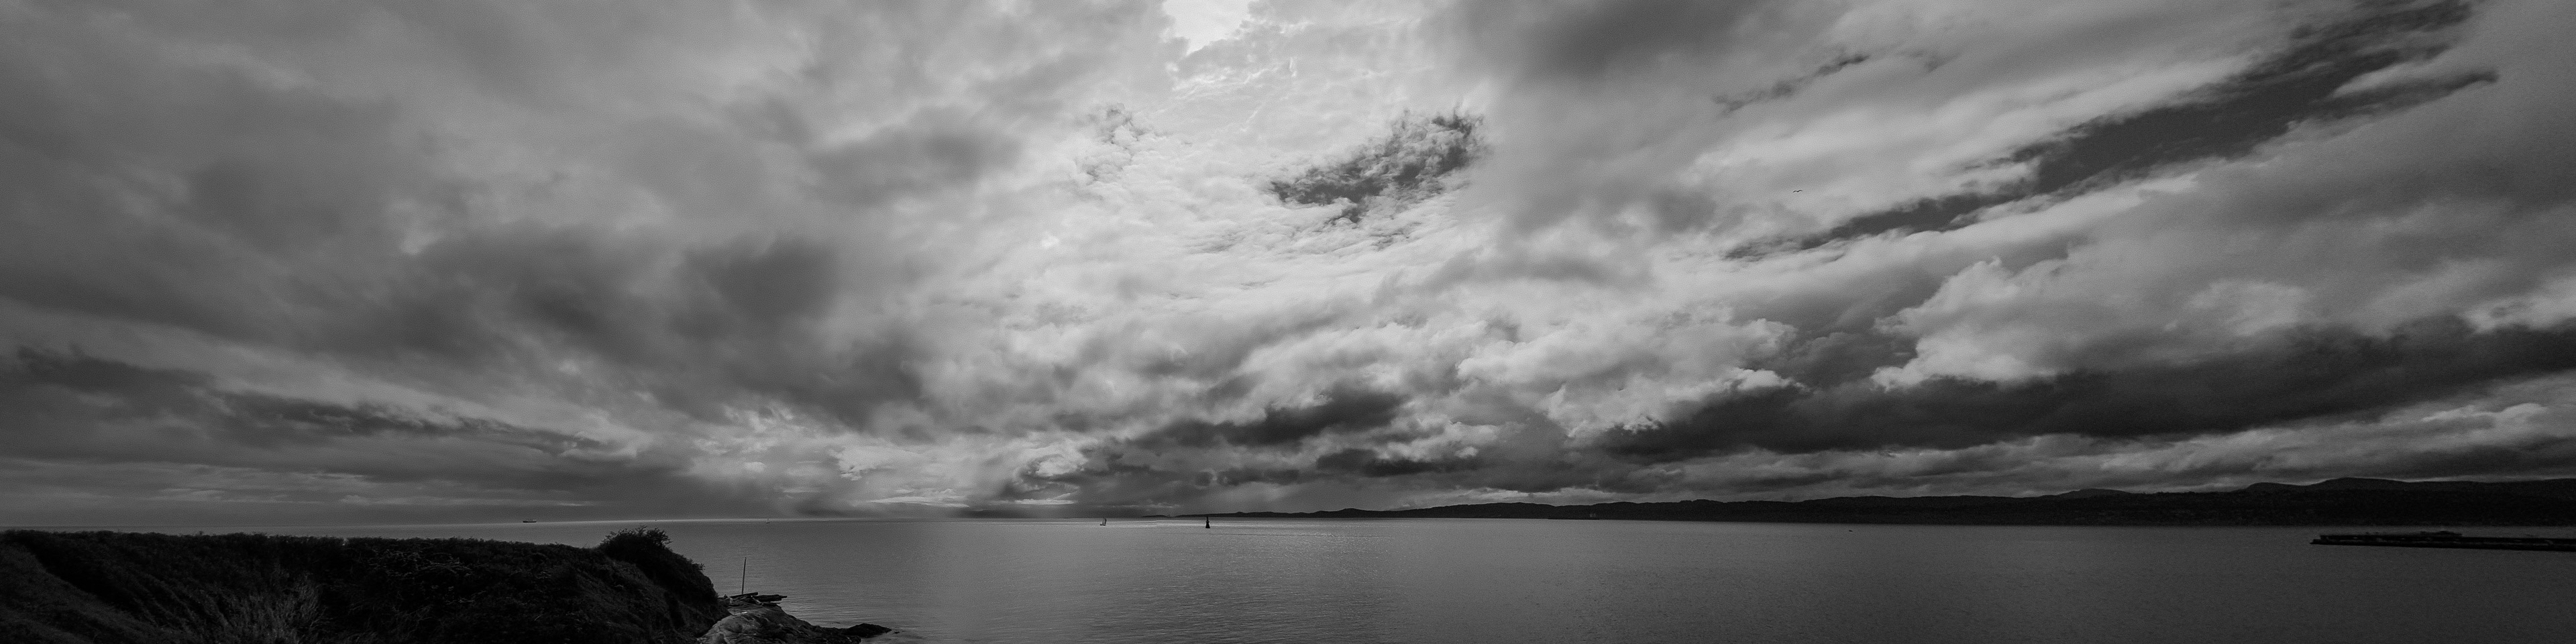
As with all special effects, you need the right base image to start with and the use of the effect can be somewhat limited. However, it is possible to generate some intriguing results, like this:

Waves Lapping the Shore
Does this work with colour images? It can, depending on what you’re looking for. You’ll get more misses than hits in my experience, but go ahead and play and see what comes out of it! Here are a couple of examples:

Purple and Yellow

An Excellent Vintage
Okay, that’s it. Now go out and make some photographs!
Hugs,
M&M
P.S. If you do have Photoshop, PS Elements or something similar, you can open an image on one layer, duplicate the layer, then take the second image and offset it by a couple of pixels both horizontally and vertically. Set the Blend Mode to Difference and you can end up with something like the following. This image shows a 4-pixel offset. Where you take it from there is up to you!

Difference