Hi Folks:
I’ve written two other blog posts on using digital techniques to mimic using a slow shutter speed when photographing moving water. They are:
Photographing Moving Water &
Photographing Moving Water Revisited
If you want to go and have a look at them, I’ll wait…
Welcome back!
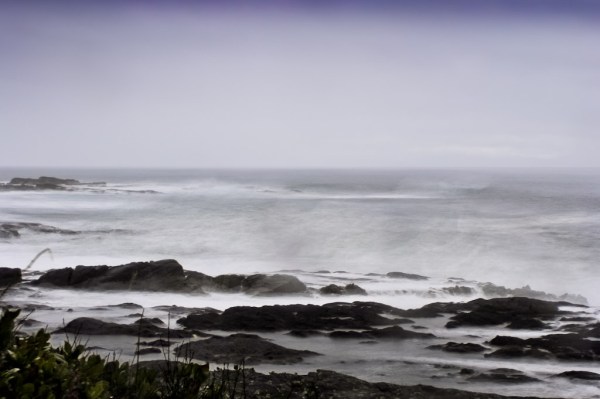
Back in March Marcia and I were down at Botany Bay in Juan de Fuca Provincial Park, and I’m still working the last of those images through Lightroom. It wasn’t a planned photography expedition so I didn’t bring a tripod with me. Nonetheless, the waves were crashing into the shore so beautifully that I ended up making several sequences of images. As I mentioned in my first post, I had previously tried combining sets of images together using Autopano Pro 2, but the software had such excellent ghost reduction that it removed the overlap I was looking for. To that end, I used the LR/Enfuse plugin for Lightroom instead.
As in this case I hadn’t brought a tripod with me, I ended up shooting sequences of images handheld. The other thing I like about Autopano Pro is that it has excellent image alignment capabilities, and since I’ve upgraded to version 2.5, when rendering an image one can choose to enable or disable the ghost reduction. Starting with a sequence of 10 images I tried turning it off first, just to see what I would get:
I wasn’t very happy with the result; while I liked the ‘misty’ effect, all of the waves were gone! So then I rendered the file again, this time enabling the ghost reduction:
This gave me what I had expected. The ‘Exposure Fusion’ looks through each pixel of each of the base images and chooses the best one, then combines them into one rendered file. Still, I missed the ‘mist’, so I brought both of these images back into Lightroom and combined them using LR/Enfuse. Actually, the shape of the waves was so dominant that what I ended up doing was making a Virtual Copy of the first image and combining those two copies with the second image. I added three graduated filters, five brushes and some Lightroom magic and the end result looks like this:
Overall, I think it’s pretty good…
Now go out and make some photographs!
Mike.
P.S. You can find more of our posts on photography and Lightroom tutorials here, and you can find links to over 200 other sites that have Lightroom tips, tutorials and videos here.


I agree with your choice the last shot gets my vote Duncan G.
Thanks, Duncan!
Hugs,
Mike.
Hello,
wow, the transformation from pic1 to pic3 ist great. For my opinion a little crop to ratio 2:1 works really good and gives the big waves more attention and power.
I enjoy your site really, not so overdressed as much sites this time.
Sry for my bad english.
Cheers
Thanks so much for the compliment, and thanks for dropping by our little corner of the 'net!
Mike.